


macinteract Pty. Ltd. | ABN 44 155 154 653 | terms and legal. | © 2026
2D Elements typically include:
Fills
Lines, Polylines & Splines
Arcs & Circles
Objects
Whenever you can’t do it with a 3D tool.
Anything you draw with 2D tools will only show up on that one drawing, story, section or elevation. Therefore the use of 2D should mainly be restricted to enhancing your drawing for presentation or detail.
Some drawings, however, will be drawn entirely in 2D. These can include Details, Elevations & Sections (when they are no longer linked to the 3D model), Internal Elevations, etc.
Although the following describes the editing of fills specifically, it can be applied to most of the 2D and 3D tools.
In addition to the basic editing functions of Fills, there are a number of more advanced editing functions available, which we will cover in this chapter. These include:
1. Consolidating, or Merging
2. Offsetting
3. Polygonal Functions
4. Multiplying
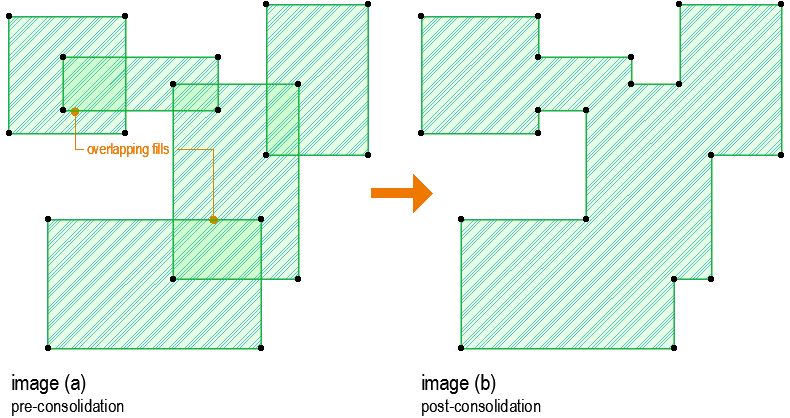
Multiple fills with the same properties, i.e. fill type, outline, pen colour, etc., can be merged into one single fill. This can be especially useful when generating Sun Studies.
Select the appropriate options and click OK.
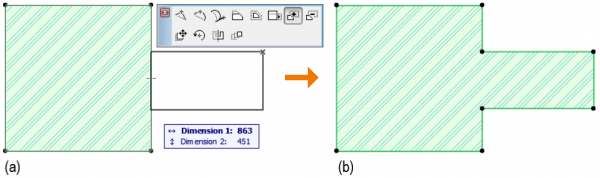
The images to the right explain the before and after scenarios quite clearly: Image 1
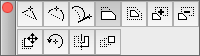
Go Edit > Reshape > Fill Consolidation…
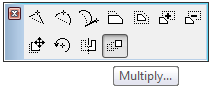
The following Palette is then displayed: Image 2
Select the fills you wish to consolidate.
TIP > Do not select the Ignore Layer tab in the Merge Settings Palette, as you will not have control over which layer the consolidated fill gets placed on.
In addition to the standard Multiply functions (drag, rotate, elevate…), there is a Matrix Multiply function in which you are able to array multiple copies of the same element (in this case, Fill) in two directions at once.
1. Select the fill and the Multiply tab in the pet palette, or Go COMMAND + U…
2. In the pop up window, select Matrix, select the number of copies in each direction, then go OK.
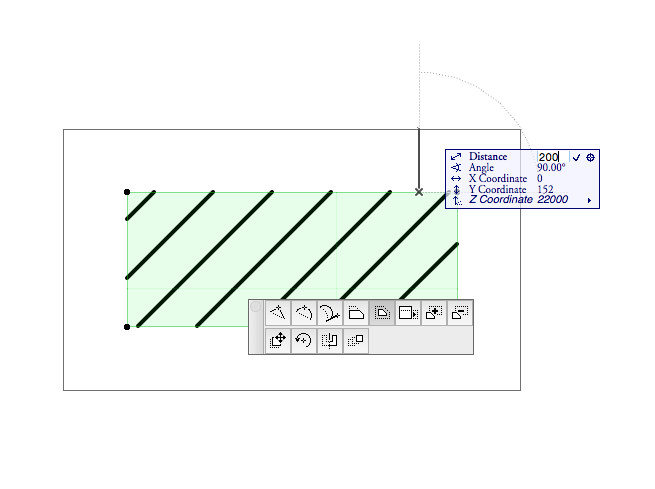
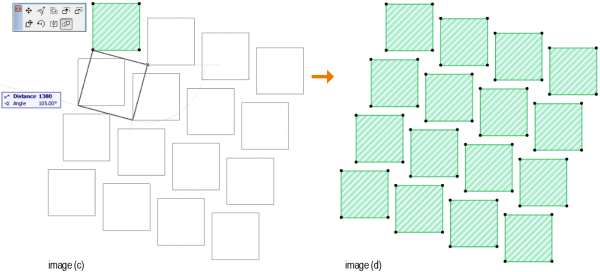
3. Click a starting point, then again to set the offset in the first direction (or type in the dimension) , drag the mouse and click the offset in the second direction, then hit Enter. You are not restricted to using this function orthogonally. Any direction is available to you. Fill arrayed orthogonally in both directions: Image 3
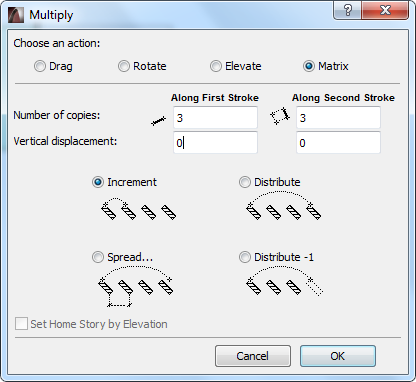
Fill arrayed diagonally in both directions: Image 4
macinteract Pty. Ltd. | ABN 44 155 154 653 | terms and legal. | © 2026
We use cookies to keep things running smoothly and help us improve—no secrets here!
Please select which cookies we can use. You can change your mind whenever you like!
Websites store cookies to enhance functionality and personalise your experience. You can manage your preferences, but blocking some cookies may impact site performance and services.
Essential cookies enable basic functions and are necessary for the proper function of the website.
These cookies are used for managing login functionality on this website.
Statistics cookies collect information anonymously. This information helps us understand how visitors use our website.
Google Analytics is a powerful tool that tracks and analyzes website traffic for informed marketing decisions.
Service URL: policies.google.com (opens in a new window)