Smart Views from Sun
Setup
Confirm the Project North and Project Geolocation are set correctly:
ARCHICAD > Project Preferences > Project Location…
Place the Views from the Sun object into the model space or worksheet (3D guides available only if object is placed into model space). Align its centre with the centre of your project (i.e. typically the centre of interest).
The object then reads the Project north angle and Project coordinates (latitude, longitude) and adjusts its orientation automatically.
General Settings
- Study Type: Choose required type of study. Winter Solstice (June 21), Summer Solstice (December 21), March Equinox (March 21) or September Equinox (September 23) are available options.
- +1hr Daylight Savings? Check this option to add one extra hour for daylight saving circumstances
- Time Zone: Set the project Time Zone (10 for Sydney)
- Time Range: Set the time range, available in 30 minute increments
- Interval: Can be set to 1 hour, 30 or 15 minutes increments
- Show 3D: Display 3D guides (refer below for details)
- Camera Distance: Set the distance of the cameras from the objects centre origin here
- Camera Target Z Height: Set this height to the RL of your projects Ground Floor level.
2D Representation
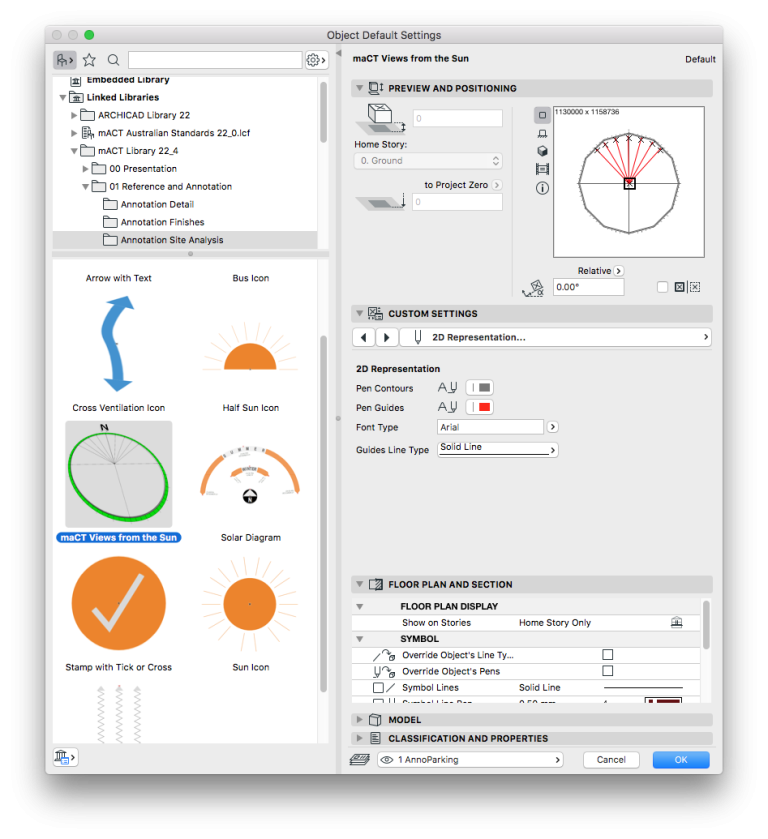
- Adjust pen colours, font and line type in this dialog.
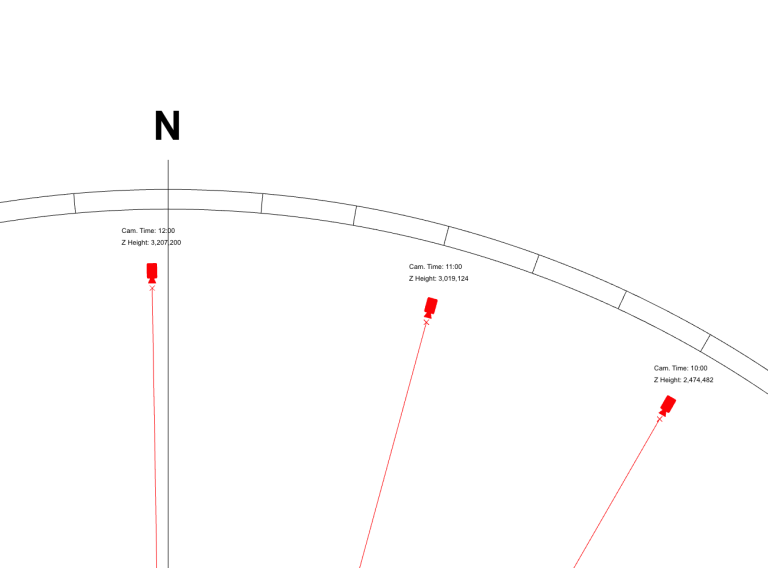
INFO > When set, the object calculates each Cameras’ orientation and height for the respective time on the chosen date.
Process
There are two setup modes available for set up…
A. align views in 3D – fast and easy
B. camera setup in 2D – not for the faint hearted…
… we recommend you choose A.
A. align Views in 3D
This is the fast and simple way, directly in the 3D editing window.
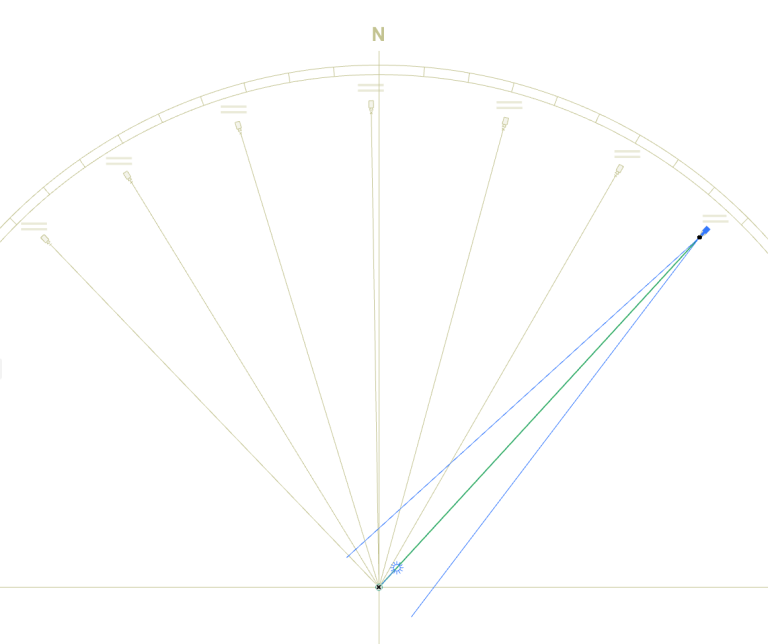
Ensure the ‘Show 3D‘ option is enabled. Open 3D window with visible 3D solar diagram, where guides are pointing towards the centre of your project, each guide is labeled with the respective time.
INFO > Best results are achieved when 3D Projection Settings are set to Axonometric Projection mode. This will avoid perspective distortion and allow you to zoom in/out without affecting the view angle.
Align the view using the ‘Look to Perpendicular of Clicked Surface’ tool (available via View > 3D Navigation Extras > Look to Perpendicular of Clicked Surface or from the 3D Visualization Toolbar).
Click on the hectagonal surface under the respective time label and the 3D view will align with the sun’s direction.
Save the view into View Map.
Continue this process for all required times.
Once complete, disable the ‘Show 3D’ option or hide the Views from Sun object’s Layer to display only the required project geometry.
B. Camera setup in 2D
Create a separate Path for each respective date that is required.
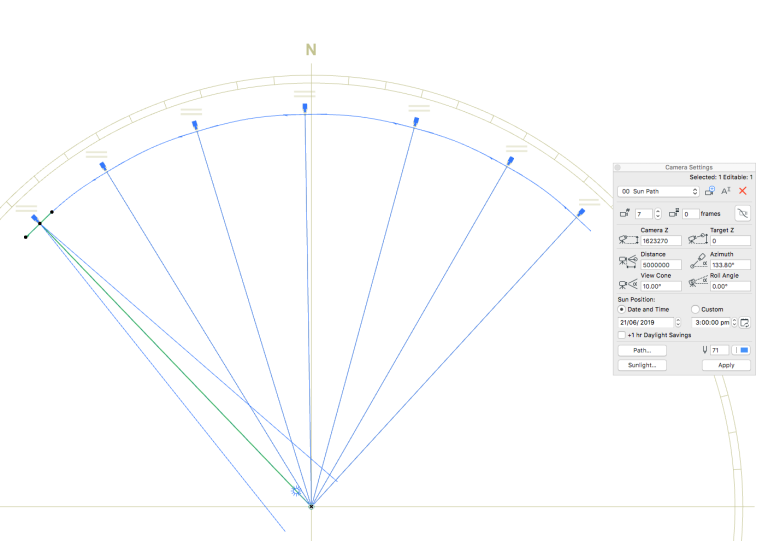
Place the first Camera as shown by the object. The first insertion point is the location of the Camera, the second insertion point identifies the Target of Camera which is in the centre of the object.
INFO > Axonometric projection mode is required to generate very accurate View from Sun diagrams, however it is not possible to setup Archicad Cameras as axonometric. To work around this Archicad limitation, you need to set up cameras as far as possible from the objects centre to minimise the perspective distortion. We recommend to set the Distance to a minimum 2,000,000
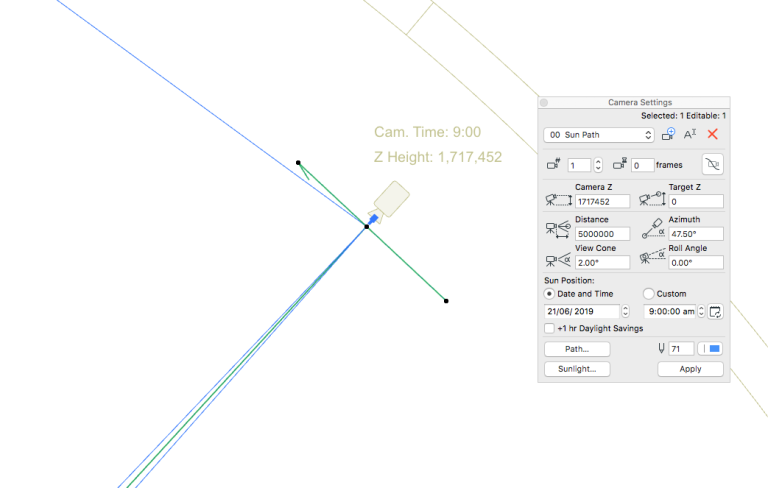
Open the Camera Settings dialog and set the following parameters:
- Camera Z: Type Z Height distance indicated by the object.
- Target Z: Is the value previously set as Camera Target Z Height (height to the RL of your projects Ground Floor level).
- View Cone: A fairly small angle ranging from 1 to 7 degrees depending on the distance of the Camera from the centre of your project (and the project size).
- Sun position > Date and Time: Date and Time should match exactly the date and time of the Camera as shown by the object (for example: when the study is for Winter Solstice at 9am set the Sun to 21/06 9:00:00 am)
Us the eyedropper tool to pickup the first Camera’s parameters and place all other Cameras with the copied settings.
Next select Cameras one by one and adjust Cameras Z height and Sun position > Date and Time for the respective time as shown by the object.
Publishing Diagrams
Set the diagrams up as Views in View Map with related view settings and:
- Place the previously saved views on a Layout or choose to publish as image files instead
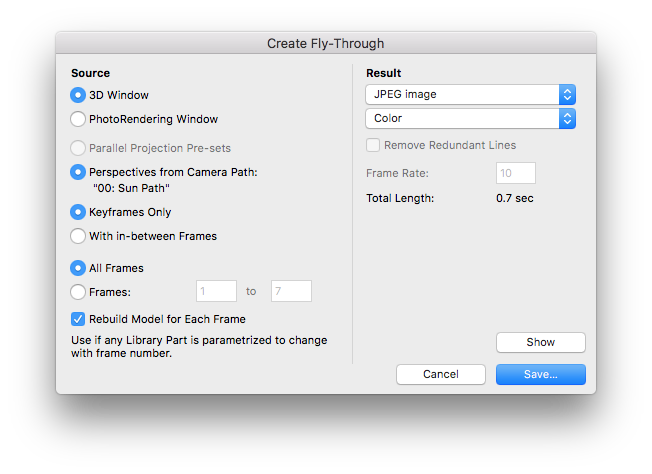
- Save the Diagrams as Keyframe (only) images via the Document > Creative Imaging > Create Fly -Through dialog.

macinteract Pty. Ltd. | ABN 44 155 154 653 | terms and legal. | © 2026