macinteract Pty. Ltd. | ABN 44 155 154 653 | terms and legal. | © 2025
SketchUp Materials are like a paint that have color and texture, where the texture is an image file.
When applying a material to your model remember the following principles:
1. Default Material
Where to find:
The top left Materials preview.
As the name suggests, the Default Material is assigned by default to all new geometry.
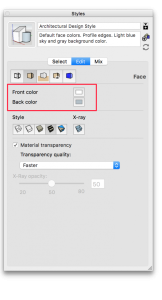
INFO > The default material has both a front and a back colour – they can only be edited in the Styles Window>Edit>Face tab.
2. Two Faces
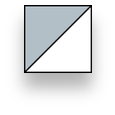
Every surface has a front and a back face that you can assign different materials to. SketchUp’s default colours are white for the front and blue for the back face. The white face should always point towards the viewer.
If a surface has its faces pointing into the wrong direction, you can Right-Click on a selected surface>Reverse Faces.
3. Applying Material to Groups/Components
To keep it clear which material is applied to what, you will have to think about the consequences of applying materials to surfaces in a group or component vs the group or component as a whole.
For example applying a material to a surface in a group or component:
1. overrides materials assigned to groups or components as a whole and
2. is reflected in all instances of a component in your model.


INFO > Materials applied within groups or components are superior to materials applied to elements as a whole. The only exception is a Default Material. You may consider the Default Material as non-material indicating front and back faces of objects.
2 minutes 42 seconds
video by @SketchUp
INFO > SketchUp comes with predefined colours and materials. You can find these organised in sub-libraries in the pull down menu under the Texture Palette (brick icon) at the top of the materials window. Remember every material you assign will also end up in the “Colors in Model” sub-library!
SketchUp uses the terms colour, material and texture very loosely, they should be regarded as one and the same.
INFO > This automatically opens the Material Editor window where you can select a Material.
Option+Left-Click:
Use this to assign the material to all adjacent faces with the same material as the one you click on.
Shift+Left-Click:
Use this to apply the new material to all surfaces (adjacent or not) with the same material as the one you click on.
Option+Shift+Left-Click:
Similar to the previous, except it will apply the new material to all surfaces (adjacent or not) within the same object (all connected faces).
TIP > To Sample a material from your model and apply it elsewhere, press the Command-key with the Paint Bucket Tool active.
4 minutes 17 seconds
video by @SketchUp
To create a new material, go to Colours in the Model sub-folder and choose one of the following options:
1. Context-click in the grey zone next to the material preview and choose New Texture.
2. Duplicate an existing material and edit it.
3. Simply place a desired colour into colour swatch at the bottom of the Material Editor and drag a colour into Colours in the Model sub-folder window.
INFO > You can set an image as a texture as well as give that image a colour = texture colorisation.
Where to find:
Select one single Surface that has a texture applied, Context-Click>Texture>Position.
Choose from options like Reset, Flip and Rotate texture as well as 2 modes of Texture re-positioning:
1.1 Fixed Pin Mode > This mode allows you to scale, move, rotate and distort a Texture using 4 coloured Pins:
Blue : Scale / Shear
Red : Move
Green : Scale / Rotate
Yellow : Distort
1.2 Free Pin Mode > This mode allows you to stretch or shrink a Texture.
6 minutes 9 seconds
video by @SketchUp
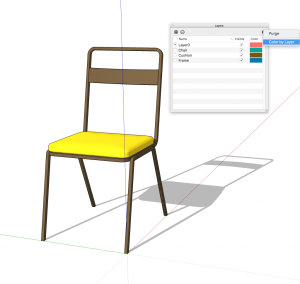
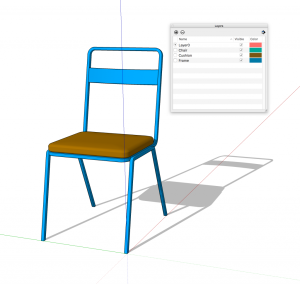
The Colour by Tag (Layer) i an alternative material assignment tool where SketchUp assigns colours to materials based on the colour of its Tag (Layer).
Although a little bit more complex, this is a powerful way to keep your model organised.
Where to find:
Tags (Layers) window>Options Menu (in the top right corner).
Use this to:
Colour elements or groups by Tag (Layer). The colour of a material indicated to the right of the Tag (Layer) name can be edited by double clicking it.


macinteract Pty. Ltd. | ABN 44 155 154 653 | terms and legal. | © 2025
We use cookies to keep things running smoothly and help us improve—no secrets here!
Please select which cookies we can use. You can change your mind whenever you like!
Websites store cookies to enhance functionality and personalise your experience. You can manage your preferences, but blocking some cookies may impact site performance and services.
Essential cookies enable basic functions and are necessary for the proper function of the website.
These cookies are used for managing login functionality on this website.
Statistics cookies collect information anonymously. This information helps us understand how visitors use our website.
Google Analytics is a powerful tool that tracks and analyzes website traffic for informed marketing decisions.
Service URL: policies.google.com