If you are setting up VPN on your mac for the first time, here are some steps to go through:

macinteract Pty. Ltd. | ABN 44 155 154 653 | terms and legal. | © 2025
If you are setting up VPN on your mac for the first time, here are some steps to go through:
Install the VPN Profile that you received;
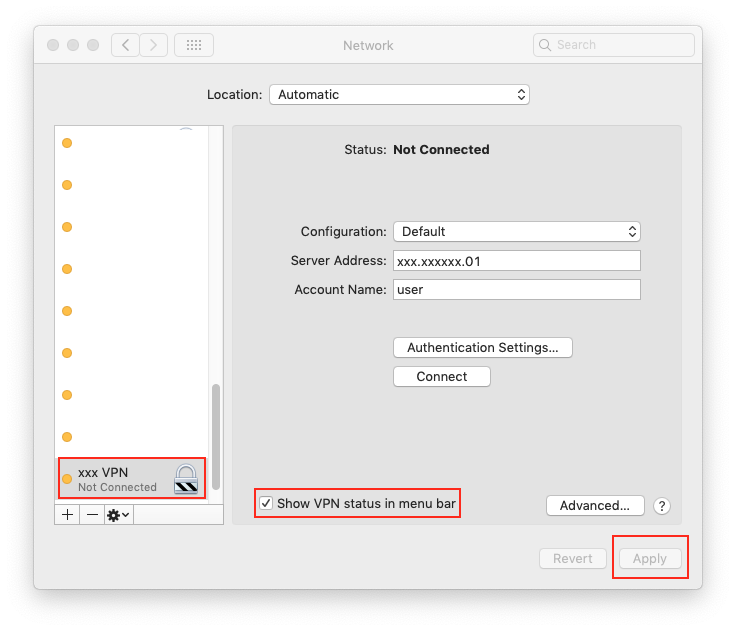
Click on the Apple logo (on top left) > System Preferences > Network
Select the VPN connection from the sidebar and check “show VPN status in menu bar”. Click “Apply”.
INFO > Please note if these settings are greyed out, first click on the Padlock at the bottom left of the same window and authenticate with an admin password.
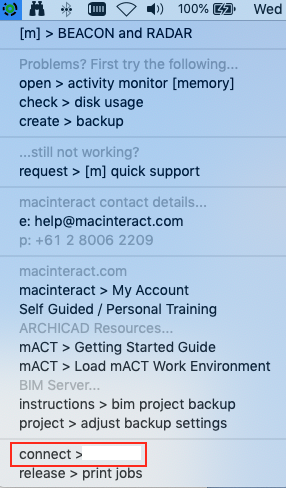
TIP > To make it easier to see that you are still connected to the VPN, enable the Show Time Connected option at the bottom of the menubar item.
CAUTION > Please note that the VPN connection will not work whilst your Mac is connected to the office network. If you wish to test your VPN setup whilst your Mac is physically located in your office, please ensure you first disconnect your Mac from WiFi and Ethernet then connect it to a 4G hotspot only.
TIP > If you have setup the above and can see the time connected displayed, but are having difficulties with the connection to your File Server please refer to the following tutorial.
macinteract Pty. Ltd. | ABN 44 155 154 653 | terms and legal. | © 2025
We use cookies to keep things running smoothly and help us improve—no secrets here!
Please select which cookies we can use. You can change your mind whenever you like!
Websites store cookies to enhance functionality and personalise your experience. You can manage your preferences, but blocking some cookies may impact site performance and services.
Essential cookies enable basic functions and are necessary for the proper function of the website.
These cookies are used for managing login functionality on this website.
Statistics cookies collect information anonymously. This information helps us understand how visitors use our website.
Google Analytics is a powerful tool that tracks and analyzes website traffic for informed marketing decisions.
Service URL: policies.google.com