B1 Modelling Strategy
Tags (Layers) and Grouping
Every SketchUp template contains a set of predefined settings for scene and units of measurement.
By default, the ‘Welcome to SketchUp’ dialog box will pop up when you open SketchUp, where you can select the right template for your design. We recommend to start with the Architectural Design – Millimeters Template if you intend to use SketchUp for architectural projects.It is essential to keep your model organised and neat.
In the following chapters we will talk about how to use Layers, Groups, Components and Hidden Geometry to organise geometry of your model in a simple and logical manner.
The big difference between SketchUp and other CAD programs is how SketchUp separates or isolates elements from each other. It is important to understand that Tags (Layers in older versions of SketchUp) are only used to toggle the visibility of elements assigned to the respective layer. For example an edge of a surface can be on Tag1 (Layer1) whilst its surface is on Tag2 (Layer2). Even with Tag2 switched off moving the edge on Tag1 will have an effect on the surface in Tag2. After all the surface exists only by having its edges defined!
Groups however form a closed environment for the elements that are in the respective group.
Thus to stop surfaces and edges from interfering with each other, they should be allocated to different groups.
1. You can make group by selecting a group of elements and pressing Command+G or alternatively right-click the selection and choose Make Group.
2. You can edit a group by double clicking it, to exit a group press ESC or click outside the group.
This sounds simple until you realise that:

Groups vs Components
Components in SketchUp are similar to groups, however they are much more powerful.
The differences between groups and components are:
1. Groups are unique entities – every group is original, whereas components can have multiple instances of themselves – in other words Components are re-usable. The major benefit of components are if you edit one instance, all other instances will update automatically.
2. Components can be dynamic, which means they can have attributes assigned to them. An example of a simple attribute would be a numerical dimension, a more complicated one would be a calculated dimension (as in a ratio dependent dimension).
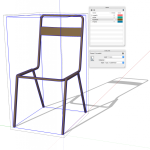
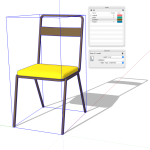
When to use: Use components (instead of Groups) when the same Group appears more than once in your model, e.g. a chair. That way if you need to edit the chair you will only have to do so on one instance of the Component and all placed instances will update automatically.
INFO > You can have components within components within components. The same logic as with tags (layers) and groups applies, i.e. keep your nesting structure as simple as possible. Sometimes nesting is unavoidable, e.g. a typical apartment in a high-rise is a Component, as is furniture inside the Apartment.
Quick Intro to Components in SketchUp
5 minutes 55 seconds
video by @SketchUp
Untagged (Layer0)
In SketchUp you use Tags for classifying and controlling visibility of objects.
Untagged (Layer0) is the default layer and cannot be deleted.
The best approach for modelling, is to use the following method:
1. Draw everything on Untagged (Layer0).
2. Group elements into logical sets. For example group all external walls, so when you are editing them they connect with each other and they are isolated from anything you don’t want them to interfere with.
3. Put the entire group on a relevant tag (layer), e.g. a layer called External Walls. (You need to add new tags (layers) to your model, we recommend naming them according to the parts of the model they contain).
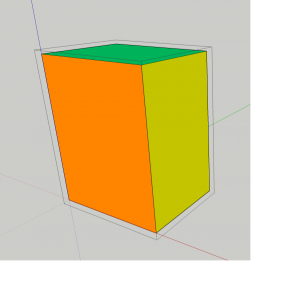
Sometimes it will be necessary to put groups within groups. For example when you are modelling a chair and don’t want the cushions interfering with the frame. In that case you have a group that is the entire chair and within that another group for the frame and a group for cushions. Those two sub-groups can both be on Untagged (Layer0) unless you would like to be able to switch either off independently. Only the overall chair-group goes onto a tag (layer) called Furniture. That way it is very transparent what goes where.
Remember there is a hierarchy to Groups associated with Tags (Layers). Lets look again at our chair example: If the Chair model is a group associated with Tag (Layer) chair and consists of sub-groups cushion and frame (each sub-group is associated with its corresponding Tag (Layer)). Then if you disable the cushion Tag (Layer) the frame Tag (Layer )will be still visible, however if you disable the chair Tag (Layer) – both cushion and frame disappear.
TIP > Use Scenes to store Tag (Layer) combinations . When you save a viewpoint to show a certain part of the model, the Tag (Layer) combination will be recorded as part of the Scene. If you need to update the Tag (Layer) combination for particular scene – hide the Tags (Layers) you don’t won’t to display and update the Scene only for Visible Tags (Layers).
Components
When you create a Component you basically create a Group ‘with benefits’. Components become reusable objects and are separated from other geometry. You can create a Component by selecting a group of elements and pressing Shift+Command+G or alternatively right-click a selection and choose Make Component.
You can edit a Component by double clicking it, exit a Component by pressing Esc or clicking outside the Component. To edit a single instance of a Component without affecting other instances, right-click on a Component and choose Make Unique.

INFO > To display additional toolbars, select View > Tool Palettes > Large Tool Set.You can save out or open a collection of components as SketchUp component file. This collection can be saved centrally on a server so everybody has access to it. You don’t need to restart SketchUp to see changes made to this folder.
Note that already placed components don’t update automatically when changes have been made to them in the central component file. You can however reload these components via selecting an instance and right-click>Reload it either in the 3D window or the Components window. This will update all components in your file with the updated version.
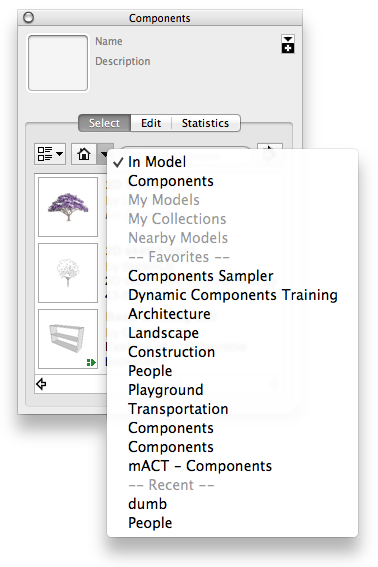
There are a number of components that come with SketchUp’s default installation. The pull down menu lets you choose different libraries of components.
Where to find:
Window> Components opens the component browser.
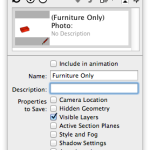
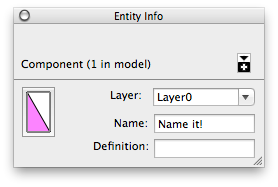
TIP > Remember to name groups and components in the Entity Info window so they are easier to track in the Outliner. In regard to components you can fill in both “Name” and “Definition”. “Definition” will be consistent for every placed instance of the Component, however the “Name” can be adjusted to your liking. For example “definition” can be “Chair” and “Name” can be “Office” to reflect the location of the instance.
macinteract Pty. Ltd. | ABN 44 155 154 653 | terms and legal. | © 2026