VPN setup on macOS

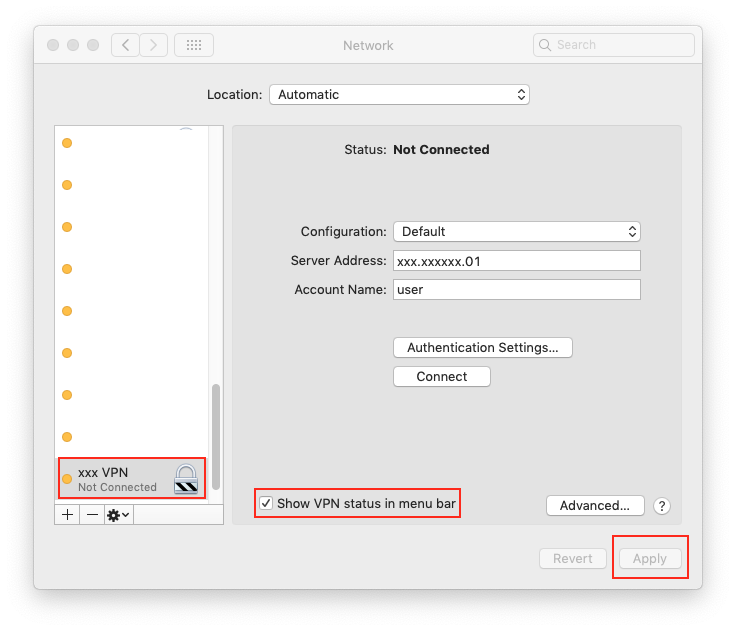
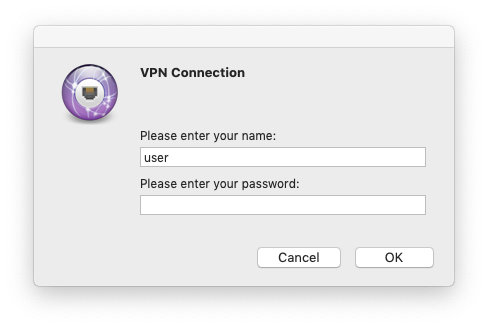
If you are setting up VPN on your mac for the first time, here are some steps to go through:

Step 1

Install the VPN Profile that you received;

Step 2

Click on the Apple logo (on top left) > System Preferences > Network

Step 3

Select the VPN connection from the sidebar and check “show VPN status in menu bar”. Click “Apply”.

INFO > Please note if these settings are greyed out, first click on the Padlock at the bottom left of the same window and authenticate with an admin password.

  • After the above you can access the VPN settings directly via the Desktop menu bar (top right, next to the Time & Date display) whenever you need to establish a VPN connection.

TIP >  To make it easier to see that you are still connected to the VPN, enable the Show Time Connected option at the bottom of the menubar item.

  • When prompted to enter your name and password, use your regular server login credentials unless other details have been provided.
  • Upon successful connection, a counter on right side of  VPN icon will be displayed – see above Tip.

CAUTION > Please note that the VPN connection will not work whilst your Mac is connected to the office network. If you wish to test your VPN setup whilst your Mac is physically located in your office, please ensure you first disconnect your Mac from WiFi and Ethernet then connect it to a 4G hotspot only.

  • To connect to your File Server use the shortcut in the BEACON dropdown menu and enter your server login credentials when prompted.

TIP >  If you have setup the above and can see the time connected displayed, but are having difficulties with the connection to your File Server please refer to the following tutorial.

macinteract Pty. Ltd.    |    ABN 44 155 154 653    |    terms and legal.   |   © 2024